We are very disappointed with our current chicken shed. We have only had it for four years and we paid a lot for what we thought would be a good shed and would last a long time.
Ever since we first had it we have battled to keep it dry. Damp started to seep through the wood in the back, left, corner. We drilled holes in the concrete around the shed to drain the water. We put guttering around it to take the water from the roof to a butt which has a hose out into the garden. We painted it with several coats of wood protector.
After all this the water still came in. The back, left, corner became so wet that it rotted the wood and we were able to put our finger through it. This scares me that something could get in so we nailed a thick wooden block over the hole on the inside. I had put wire mesh around the outside and slipped a block of wood between the hole and the mesh outside.
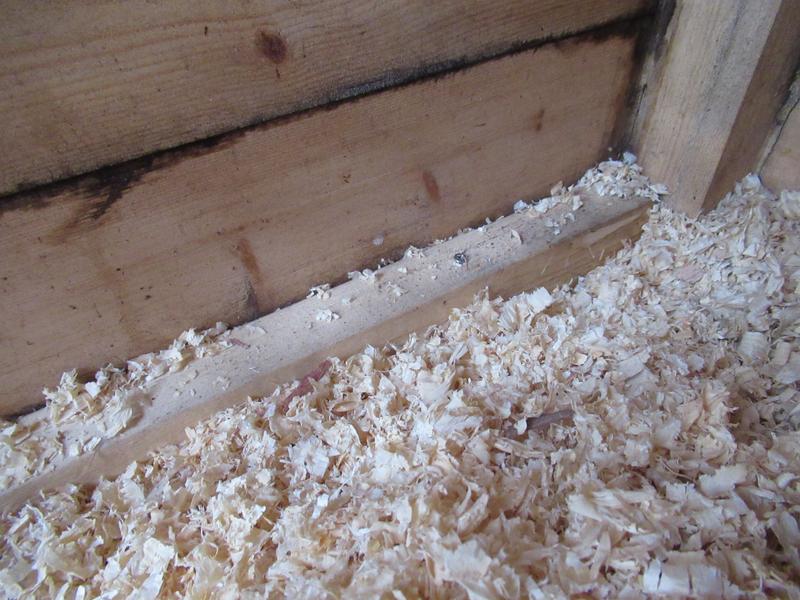
A thick block of wood covering the hole
The dark stripe above the block of wood is damp.
During the recent, relentless rain, the damp inside the shed has got worse. It is now all along the left side of the shed and has risen up to the height of the perch. This worries me as with a history of respiratory problems with the flock the last thing they need is damp.
The perch in front of the damp patches is where Cinnamon and Jasmine perch so I have taken to moving them at dusk each night. I perch Jasmine with the amigos and Cinnamon next to Speckles.
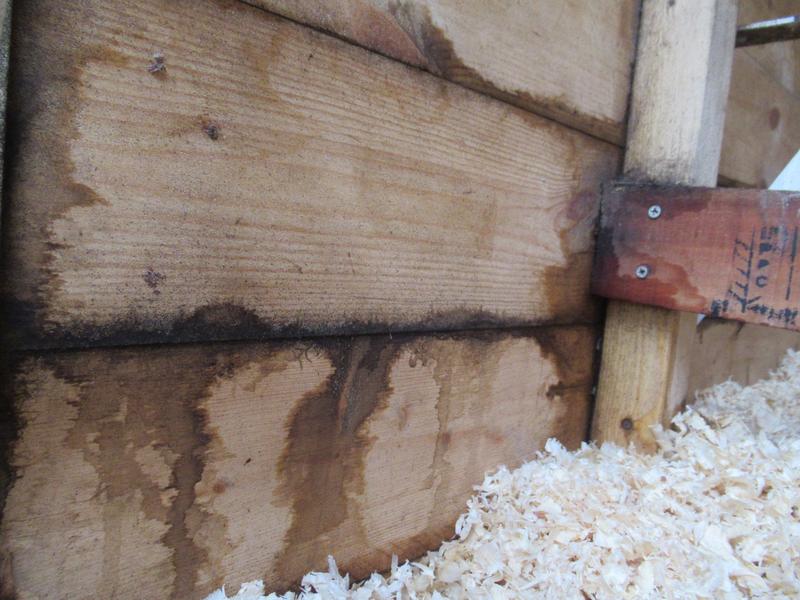
Wet patches behind the perch that Cinnamon and Jasmine were using
The piece of wood at the right of the photo is the arm that holds the perch and the damp is creeping across that too.
With hind sight we think we should have put the shed on a low wall to keep it off the ground but the old shed was straight on the concrete and was never damp as is our cabin which has caused no problems. We feel that it is the type of wood that the shed is made from which is drawing the water up.
After a lot of consideration we have decided to buy a plastic shed. We have ordered one of the smallest size so that it will fit inside, on the patio area, in front of the existing chicken shed. This will have the advantages of being safer from predators, being under an already dry area and will be easier to deal with red mite. It was also cheaper at two hundred pounds.
What we intend to do is to put it together inside, on the patio area, while the existing shed is still there so that it will mean there will be no hurry to get it ready. We will move the pop hole and automatic door to the new shed. We will put in the perches. It has ventilation strips above the door but if we find we need more ventilation we can drill some holes as it won’t need to be water tight as it on the dry, roofed, area.
When it is ready we will block up the pop hole on the wooden shed to stop the girls going in and leave it for a while until we are ready to decide what to do next. We will probably, eventually, take the wooden shed away and block off the back but we need to decided how best to do this to keep it secure. For now there is no hurry to deal with this as the new shed can just sit in front of the old shed.
The new shed is due to be delivered on Saturday. We have an afternoon tea booked on Saturday so we will tackle the new shed when we have the time to do it. It will be tricky putting it together in the confined space and making the adaptations so we won’t rush it but I think it will be well worth it in the end.
It will give me peace of mind having it inside as I won’t constantly be worrying about keeping it secure. It will be better for the girls as it will be dry and it will be easier to deal with mites. At the moment I spray with smite every few days and it’s a constant battle to keep mite numbers as low as possible. I have got it down to, pin prick sized, mites, that are newly hatching but I have to keep on at it all the time.
I know getting the shed ready is going to be a bit of a nightmare but I know that it will be well worth it in the end. The chicken run has always been a work in progress and finding the right housing for the girls has been similar, going from a wooden coup, to a wooden shed, to a plastic shed, but we have to learn as we go along and is difficult to know from the start what is going to be the best.
I have learned over time what the best height is for the perches so I am determined that in this shed we will get everything right from the start as working with plastic is not going to be easy. Watch this space.
 Click here to see the history of my flock.
Quite a job for you both, This weather has certainly caused a few problems.
Looking forward to seeing the new shed up. We have lost a lot of plants, and have spent hours out in the garden getting it all back to looking lovely, but at least our home did not get flooded, we are thankful for that.
It is going to be quite a job but it will be worth it in the end. We looked at the reviews and they all said that they were very pleased with the end result but that it was tricky to put together especially the roof so in a confined space I just know that it will be difficult. The height only just fits. We have struggled with trying to keep the sheds dry right from the first year we had them and this recent wet spell was just the last straw. We have rose petals every where and the path is constantly covered despite Richard sweeping every day. Our hollyhock is only about two feet high and not looking very healthy. I don’t think they like this garden.
Sounds a good plan!! xx
I hope so, I am sure this is going to work out better, once we get it up and running. xx